Even though winter months have just barely begun, it’s time to start thinking about spring! Growing plants from seeds is an exciting and fulfilling undertaking. Utah gardeners; now’s the time to start your seeds inside (also known as seeding indoors). If you haven’t done it before, Glover Nursery is here to help. We’ve got you covered with all the tips and tricks (& seeds!).
One of the many benefits when growing from seed is that you have more options than you do when you transplant from starts. If you’re looking to grow a lot of vegetables, it’s typically cheaper too. You can start all sorts of seeds indoors, including: broccoli, brussels sprouts, cabbage, lettuce, and tomatoes (to name a few favorites here at the nursery). As for vegetable gardening, seeds that have a slower root development, like cauliflower, eggplant, and peppers, also benefit from being started indoors. But it doesn’t have to stop at vegetables! We have a HUGE selection of seeds for your garden. Visit our Utah garden center to see the entire range of hundreds of choices.
You may also check out: How to Plant Seeds for a Home Herb Garden
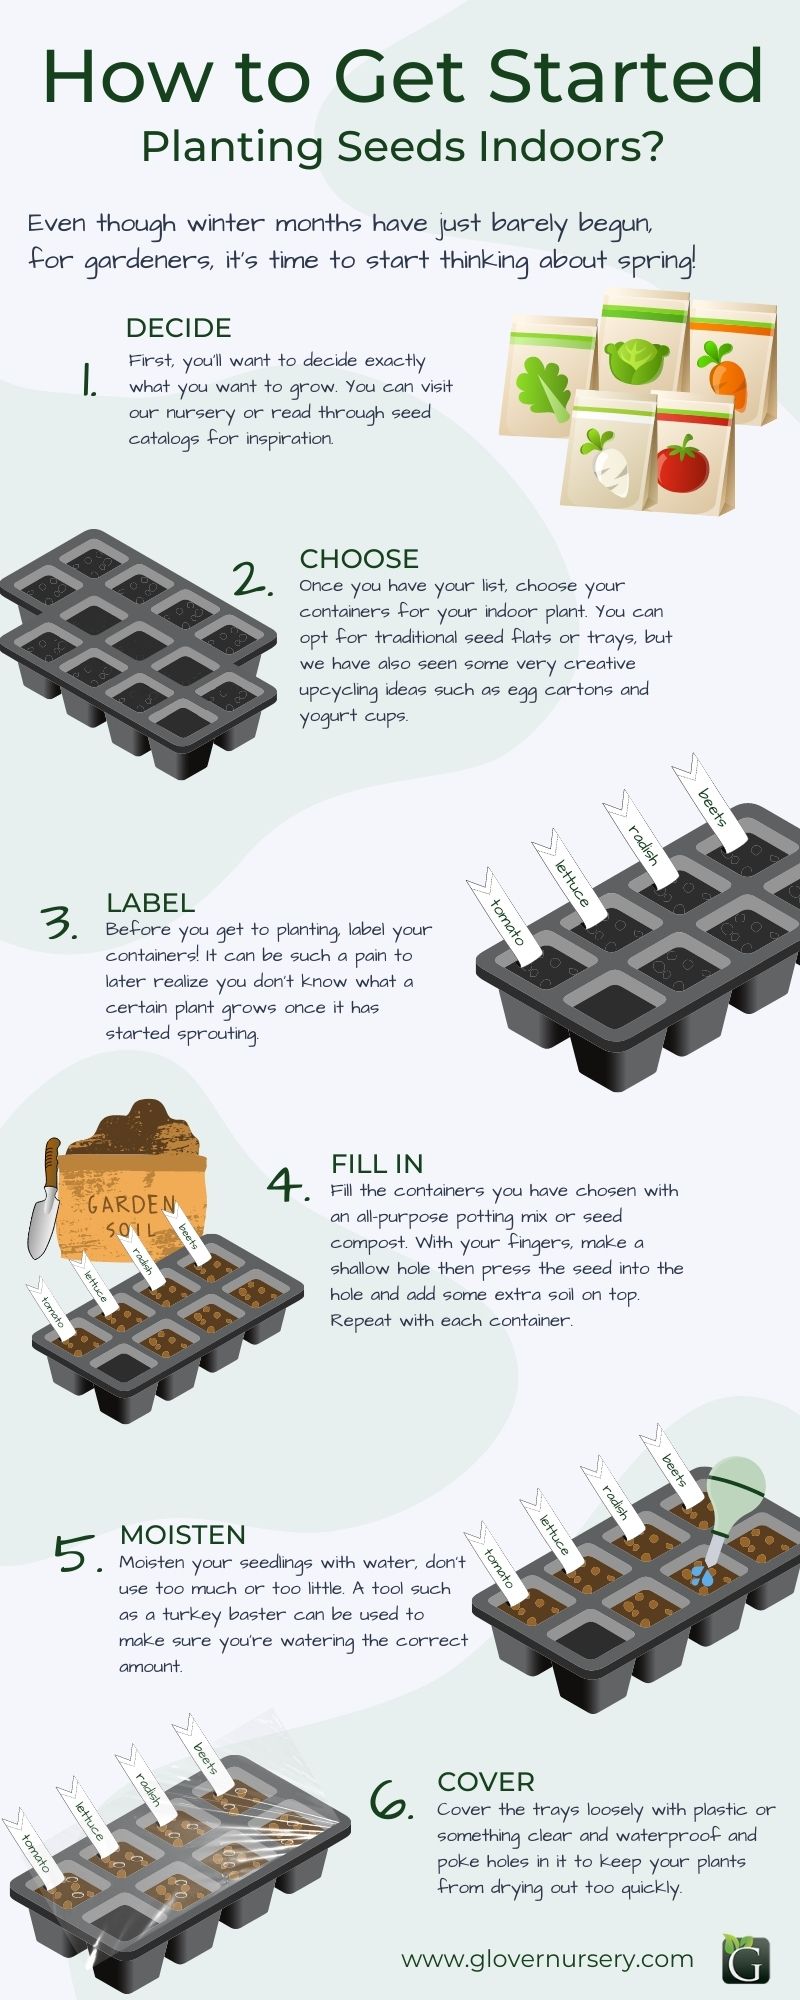
How to Get Started Planting Seeds Indoors?
- First, you’ll want to decide exactly what you want to grow. You can visit our nursery to look over the selection, or read through seed catalogs for inspiration. Before you buy dozens of seeds, to save on money and potentially wasted food, a few questions to answer first:
- What does your family love to eat? (maybe pick a few more varieties)
- What does your family NOT like to eat? (don’t grow it if they won’t eat it)
- How much sun do you have available? (veggies need some sun)
- How much space do you have for gardening? (if it’s a tiny area, maybe no on vine plants)
- Once you have your list, choose your containers for your indoor seeding. You can opt for traditional seed flats or trays which are easy to use and are re-usable. We have also seen some very creative upcycling ideas such as egg cartons and yogurt cups. Depending on what you have laying around the house or containers you have an excess of, you can use those!
- Next, you’ll want to do this VERY important step. Before you get to planting, label your containers! It can be such a pain to later realize you don’t know what a certain plant is once it has started sprouting.
- Pro-tip, use popsicle sticks and a sharpie. Write the seed name as well as the seeding date so you can keep track of how long those seeds have been in the soil. That way, you’ll know sooner than later if something isn’t germinating properly.
- Fill the containers you have chosen with an all-purpose seed starting mix, the soil is designed specifically to help seeds get their best start.
- With your finger, make a shallow hole (the ideal depth should be listed on your seed packet as well as any other pre-planting needs the seeds may have). Then press the seed into the hole and add some extra soil on top. Repeat with each container.
- Moisten your seeds with water, don’t use too much or too little. A tool such as a turkey baster can be used to make sure you’re watering the correct amount without blasting the seeds out of the soil. Or, if you are using a seed starting tray, they are designed to pull water from below, so you can soak the tray from the bottom up to ensure proper saturation.
- Finally, cover the trays loosely with a seeding dome, plastic wrap, or something clear that is also waterproof. Poke holes in it to keep air flowing properly around the soil.
You can refer to this planting calendar for the ideal planting time for your seeds.
Other useful links: Seasonal Tips: Seeding for spring
Watch Your Garden Seeds Grow
Keep your pots moist and warm, and be sure to check them regularly. Once you start to see sprouts, move the containers to a light source like a window or indoor grow lights, if you have them. If you place them by a window,, rotate them regularly so the plants are getting equal amounts of light. Monitor the moisture level so they aren’t soaking wet, but don’t dry out entirely, either.
Signs of Overwatering: Yellow wilting leaves, mold or mildew, stunted growth.
Signs of Underwatering: Soil pulling away from the container, brown drying leaves.
With a little bit of TLC, you’ll have healthy sprouts in no time, and come spring you can plant them in their more permanent home: your garden! If you ever have any questions about growing seeds or any other gardening matter, reach out on social media, give us a call, or even better come and see us at our nursery and garden center in West Jordan, Utah.

