I learned to grow vegetables from seed at the side of my grandfather.
Though that may conjure images of a sweet man patiently showing a little girl how to dig a hole in the backyard, the reality is I was in my late teens and my grandpa was running the greenhouse here at Glover Nursery. His goal, and therefore my goal, was to start enough tomato seeds to fill every garden in the Salt Lake Valley.
Together we ran an efficient team and very nearly grew enough tomatoes to fulfill that vision. Fact is, you may very well have been one of the customers that took one home during my apprenticeship (for which I thank you and hope you made some yummy salsa).

In addition to tomato seeds, at his knowledgeable side, I learned to sew herbs, squash, cucumbers, pumpkins, peppers…the list goes on and on…all from seed. It never failed to amaze me that he would pull a dusty bin out from under his bench where these little seeds had stayed dormant for months, sometimes years, just waiting for the right conditions to start their own journey from seed, to sprout, to plant, to becoming a bountiful harvest that would grace many tables over the course of a season. When we hear the term “farm to table”, I can tell you first hand where that starts – and my many destroyed manicures will back me up.
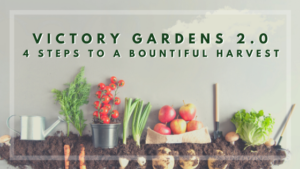
When I look at the seed racks that are set up and ready for our customers to start their own growing journey, I wondered what I could share that would help them make the greatest success of their time and efforts. While it is not rocket science, thank goodness, there are a few things I learned at the hands of my grandfather that will help anyone looking to create their own growing fields, or, maybe just to fill a garden box (if you’re not trying to feed the whole valley, like he was).
Preparation is key to everything.
Tip #1 – Make sure you have the right set up so your seedlings have the best advantage for a successful start. This includes having your seed trays filled with a great soil mix to give them the nutrients they need while holding moisture in the soil for those tender roots to grow. While you could throw a bunch of seeds into any old soil and hope for the best, to guarantee a good crop, start with good soil, an easy ability to keep the soil moist (not wet) and plenty of light.
Seeds need moisture, heat and light and you want to make sure it is all in balance.
Tip #2 – Watering can be a tricky thing to get right. Too much water drowns them, not enough water and they won’t get that little magical spark that helps them grow. Seedlings need to have a slightly damp environment while they germinate. I learned from my grampa, the easiest way to know how moist the soil is – stick your finger in it. If the top is feels wet but it doesn’t percolate down, then you need to put a bit more water on and let it soak in. There is also the trick of the trade which is to water from the bottom up; seed trays are designed specifically for this type of watering which allows the soil to absorb the water it needs through the holes in the bottom of the tray. A good soil will help hold moisture properly, it is worth getting an appropriate blend designed for starting seeds.

Tip # 3 – If you are going to start your seeds outdoors, be sure they are protected from the cold. Seeds need warmer conditions to get started, so if your seeding trays are in a shed with no insulation or warming counters, those little guys are not going to make it. It doesn’t need to be a blazing inferno by any means, but watch the temperatures and keep them steadily warm. A good range to have in mind is 65-75 degrees until the seeds sprout. After they sprout, they can handle a bit more variant in temperature (though, I wouldn’t recommend sticking them directly outside just yet! Make sure the weather is holding steady in spring temperatures before hardening them off for transplanting). One way to help them along is cover the trays with glass or plastic, this creates a mini greenhouse environment that helps retain moisture and heat.
Tip # 4 – Depth of planting matters. Imagine you’re a seed and you get stuck down deep in the soil, so deep that it feels like you will never make it out….well, you won’t. Seeds can’t grow out of soil that is 10-20x deeper than they are tall. If the seed packet doesn’t have a recommended planting depth, a good rule of thumb is to plant the seed no deeper than 3 times the width of the seed. This can be a bit tricky to figure out, but one thing we did in Grampa’s Greenhouse was to press all the soil before laying seeds on top, then cover the seeds with a light cover of soil before watering them in. The pressing of the soil beneath the seeds will prevent them from sinking down too far and a light dusting of soil above will settle in around them with watering. This way, they are protected and getting necessary moisture while still able to reach for the light.
Speaking of reaching for the light
Tip # 5 – Light source is important. Seedlings need light, lots of light. Though the days are getting longer, the likelihood that they will get enough light sitting in a garage or shed, even if they have south facing windows, is low. It would be extremely beneficial to invest in a growing lamp and make sure that lamp shines on them between 12-16 hours per day. There are loads of great DIY ideas out there of how to build growing tables or structures to make this work easily. We don’t have a favorite because there are so many wonderful ideas and different ways to utilize your space. A quick Google search will bring up dozens of amazing ideas; look for something that is easy to install in your growing area.
Label everything
Tip # 6 – The last thing I would recommend when starting out with growing seeds is to make sure and label everything. Sharpie on a popsicle stick is a great combo for this because neither will wash away if they get wet. Put the name of the plant and the date you started seeding. This way you can monitor the seedlings and if they haven’t started sprouting in the expected time frame, you’ll be able to tell sooner than later. Every type of seed has a different length of time it takes to germinate, so making sure it is all properly labeled will help guide you as to which seeds may not have made it versus just needing a bit more time to get growing.
Is it worth it?
After reading all this you are probably wondering why you should bother! Well, I will share one more thing my grampa taught me when I asked him the same question. A tomato that started by your hand, grew because of your work and ripened in the sun due to your efforts tastes a heck of a lot better than anything you can get at the store. He, as always, was right.

Happy Seeding!!! Let us know what you grow – or feel free to share any time, we are open from 8am-6pm through March (closed Sundays) J
~ Regan Glover